A common trouble people face while losing weight is melting down the belly fat. The fat in this area is considered to be stubborn, and you need to work hard to trim it down. A fat tummy may be an aesthetic concern for many, but it can be a severe health concern. To understand the potential harm that abdominal fat poses to our health, we must first find out what it is. The name already suggests that it is the fat accumulated around our waist and stomach, but there is more to it. There are different kinds, some of which such as the subcutaneous fat are harmless. The most dangerous is the visceral fat (accumulated under the stomach muscles and wraps around the organs.) This type of fat enhances the risk of heart diseases, high blood pressure, diabetes, dementia, and certain types of cancers.
Fortunately for those who practice yoga, the good news is that various asanas can assist in burning the visceral fat. You can try fast-paced yoga classes if you want to reap the benefits of cardio along with the relaxing asanas. If you’re going to practice at home, then you can try postures that focus on your abs, abdomen, waist and core muscles. Here is a list of 7 such yoga poses to help you out:
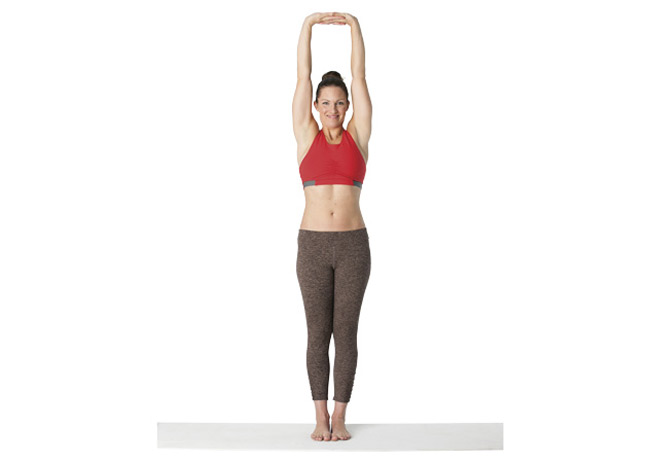
Mountain Pose (Tadasana)
It is one of the easiest yoga asanas to begin your practice and is excellent for warming up. It can improve circulation and free the tight muscles.
How to do the Asana?
- Stand straight and keep some distance between feet.
- Hands should be hanging alongside your body.
- Now while deep inhaling raise your both the arms upwards and interlock your fingers.
- Raise your heels and stand on your toes. Feel the stretch in your body from feet to fingers of arms.
- Hold this position and your breath for 10 seconds.
- Now while exhaling release your pose to come to the starting position.
- Repeat this cycle for 7 – 10 times.
Cobra Pose (Bhujangasana)
The cobra pose helps tone your abdomen, neck, and shoulders. It is also beneficial for strengthening the upper body muscles and abs.
How to do the Pose? 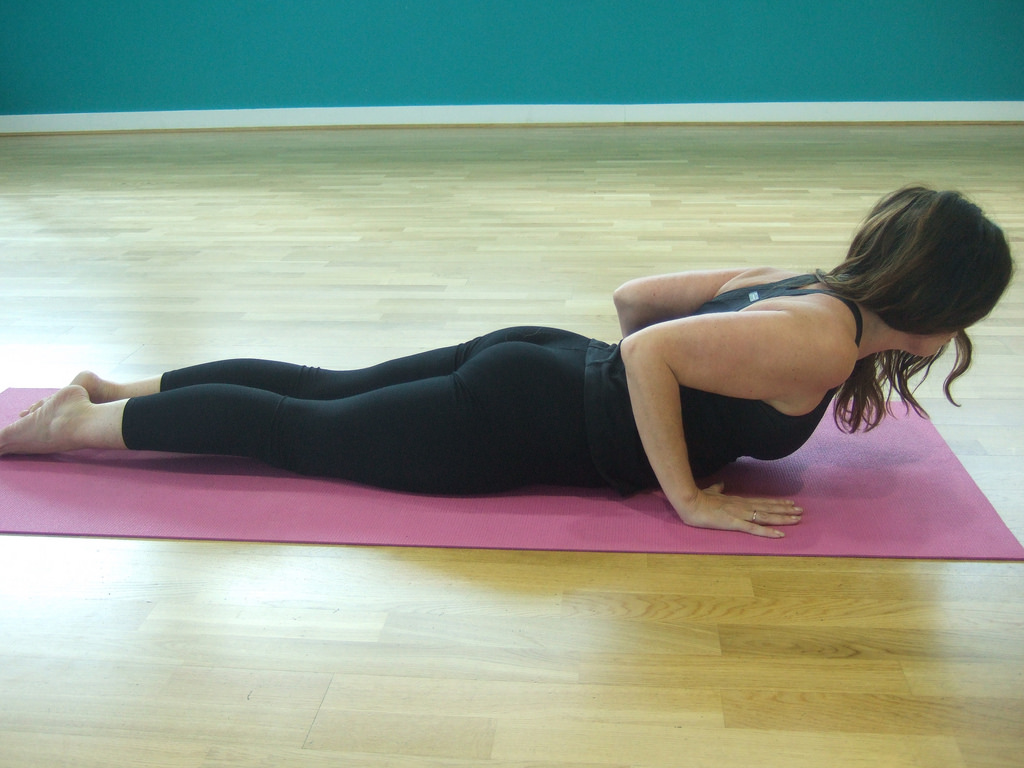
- Lie on the yoga mat and stretch your legs with your palms under your shoulders. Don’t tuck your toes and let your feet rest on the mat. Bring your elbows towards the side of your body.
- Press down through your feet and pubic done. With an inhale, lift your chest as you straighten the arms.
- Bend your body by bringing the shoulders backward. Don’t put any weight on your hands and let the body bend as an extension of the spine without putting any pressure.
- You can continue the pose for up to 30 seconds but do it only for as long as your body and flexibility permits.
- Slowly exhale while bringing your chest and forehead to touch the ground.
Plank Pose (Khumbakasana)
Plank is again one of the most effective and comfortable asanas for beginners to try. It strengthens the core and is great if you want to develop abs.
How to Perform the Asana? 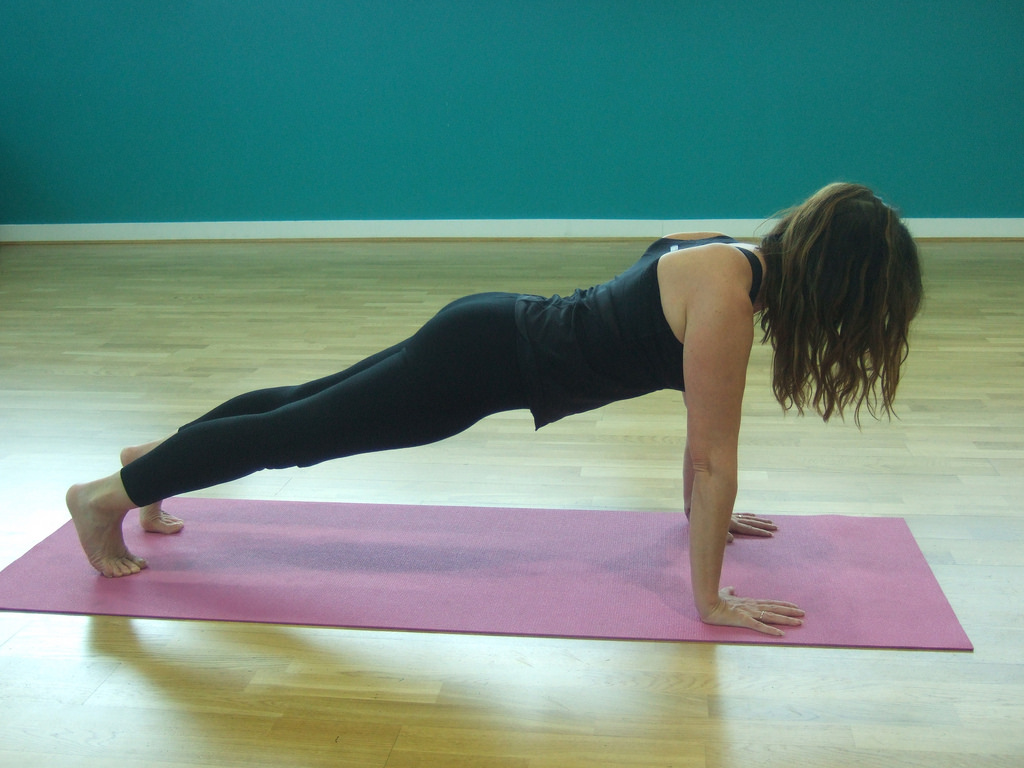
- Start on your hands and knees such that your palms are placed beneath the shoulders and knees beneath the hips.
- Press your outer arms and firm your shoulder blades. Extend the legs while pressing the thighs towards the ceiling.
- Raise the base of your head away from the neck and look a little ahead of your palms. Make sure that your whole body forms a straight line.
- Continue the pose for 15 to 30 seconds and release by drawing the knees towards the floor.
Boat Pose (Navasana)
The posture requires you to create a 45-degree angle which will help attack the stubborn abdominal fat while strengthening the legs and back.
How to do the Asana?
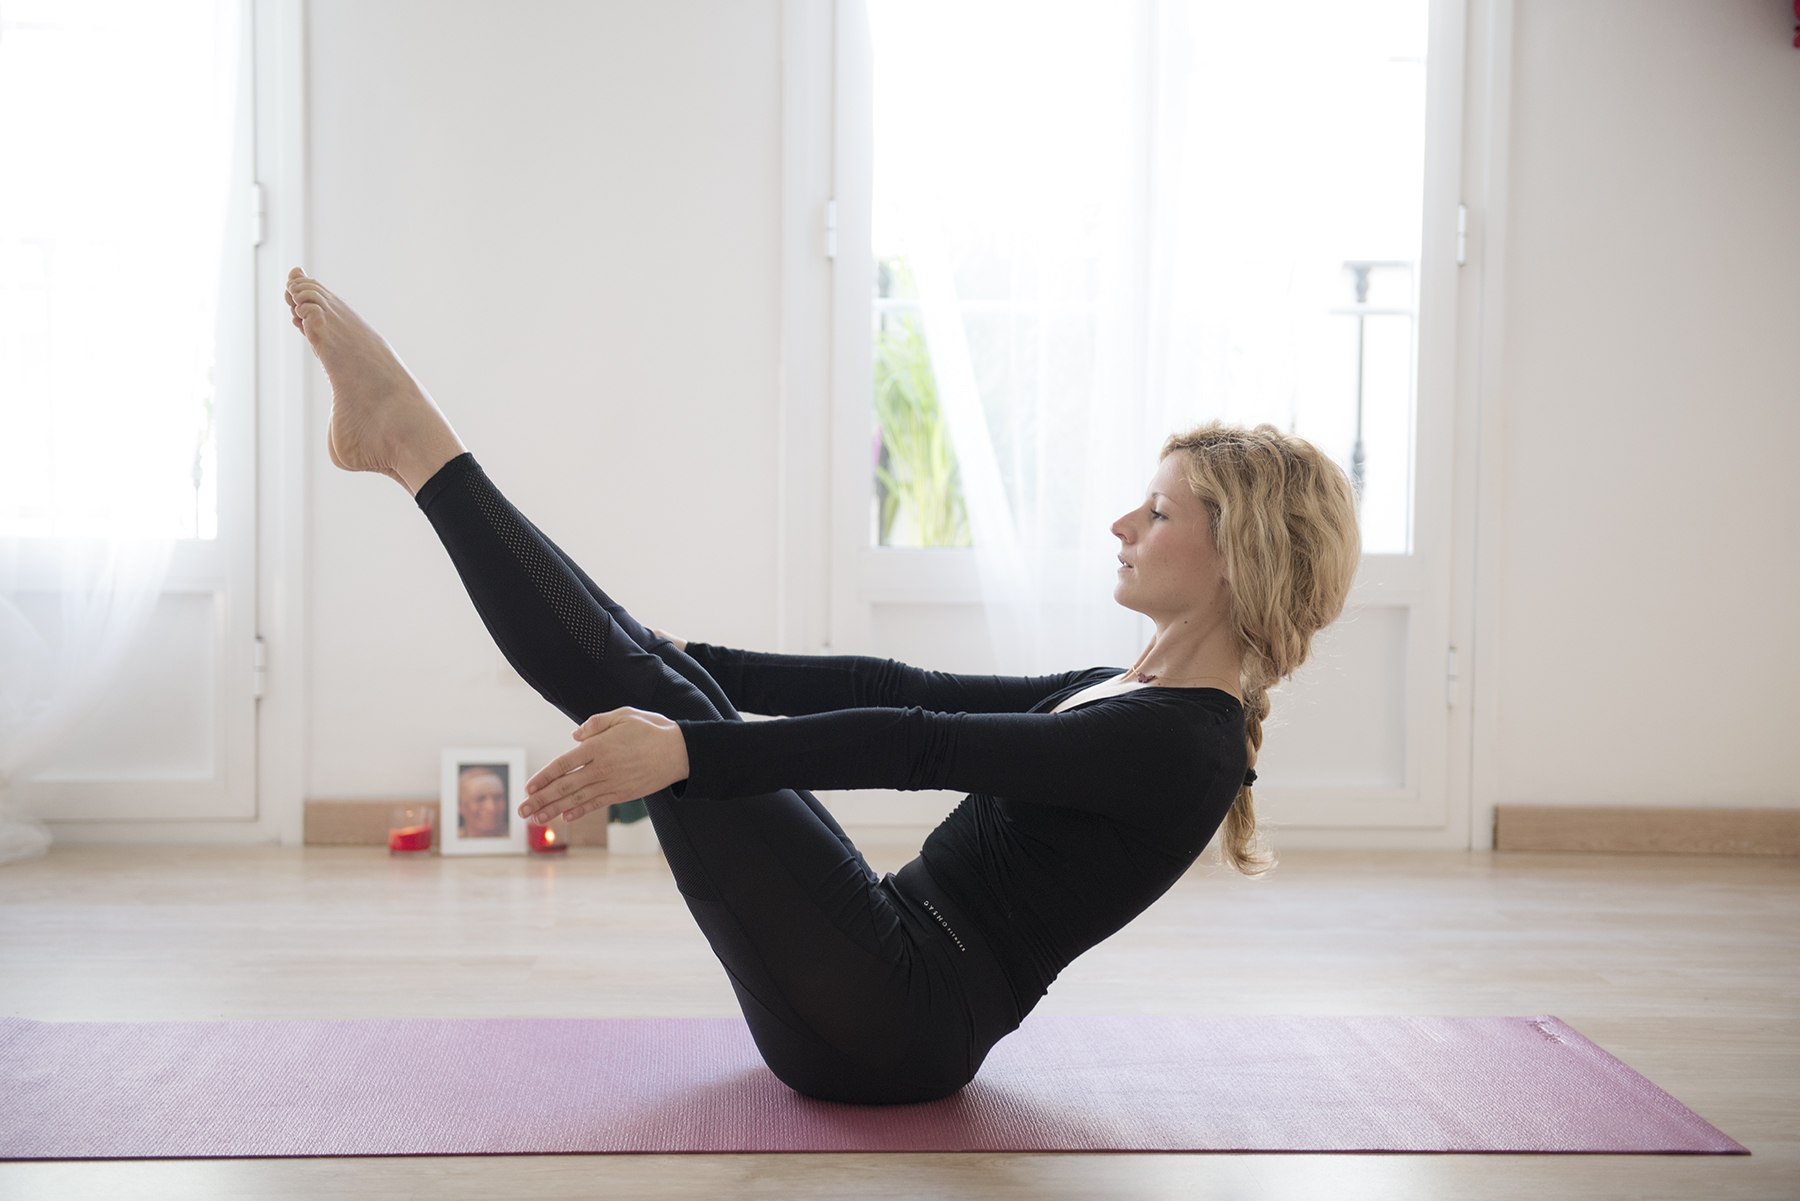
- Sit on the yoga mat with your knees bent. Keep your hands beside your hips and lean back with your spine straight.
- Lengthen your torso and raise your chest.
- Now extend your arms such that they are in line with the shoulders.
- Ensure that your spine is straight and with an exhale, lift your legs at an angle of 45 degrees.
- Keep breathing smoothly and stay in the pose for 5 to 10 breaths.
Bow Pose (Dhanurasana)
It is a great pose that enables you to stretch your back, thighs, abdomen, and chest. As it tightens your abs and strengthens the core, it assists in trimming the belly fat.
How to Perform the Asana?
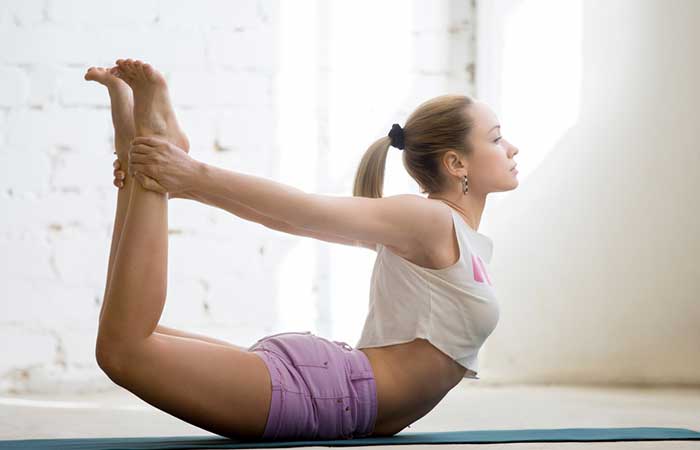
- Lie on the mat; stretch your legs and arms at each side of the body.
- Bend your knees such that your arms can reach your feet, hold both feet with your hands.
- With an inhale, raise your head and bend it towards the back. Also lift your legs as high as you can.
- Continue the pose for 5 to 10 breaths; make sure you keep breathing smoothly.
Bridge Pose (Setu Bandhasana)
To lose the stubborn fat, you don’t only have to work your abs. It is equally essential to work those glutes and supporting muscles. The bridge pose is the perfect asana to strengthen the core muscles.
How to Perform the Asana? 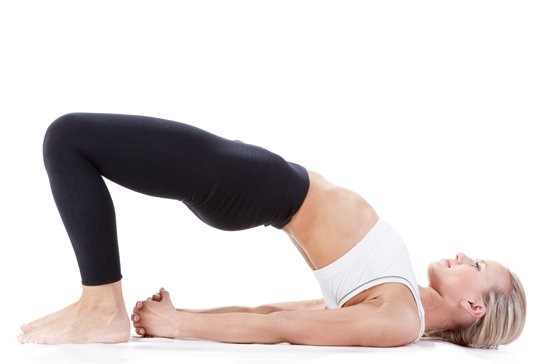
- Lay on the mat with your back with your feet placed a hip-width apart.
- Stretch your arms beside your body with your palms facing downward.
- Bend your elbows with your fingers pointing towards the ceiling.
- Press your feet and elbows on the floor while raising your chest.
- With an inhale, lift your buttocks off the floor and bring your tailbone towards the back of the knees.
- Straighten the elbows; engage the legs and hips in raising the chest.
- Bring your chin away from the chest and lift the breastbone, continue the pose for 5 to 10 breaths.
Wind Relieving Pose (Pawanmuktasana)
The yoga asana is particularly beneficial for those who suffer constipation or irregular bowel movements. It targets the colon to improve health, boosts metabolism and can help firm and tone the abdominal, thigh and hip muscles.
How to do the Asana? 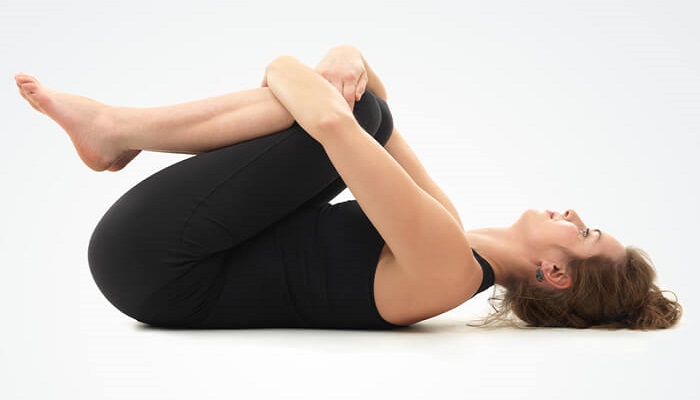
- Lie on the mat with your back facing the ground and your arms along both sides of the body. Stretch the feet such that the heels touch each other.
- Bend your knees with an exhalation and bring them towards the chest slowly.
- Hold the knees by clasping your hands around them. Next, lengthen your left leg and continue holding the right knee only. Continue the pose for about 60 seconds.
- Now draw the left leg towards your chest and again clasp both the knees with your hands.
- As you hold the left knee, stretch the right leg. Hold the posture for as long as you did with the right knee.
- Again draw both the knees towards the chest and gradually release with an exhale.
Image sources: google
This is a guest post written by Kelly Newman. The author’s views are entirely his or her own and may not reflect the views of Damn Ripped! You can find their details below. If you would like to contribute to the growth of damnripped.com, please check our guidelines page for information about how you can share your knowledge with our growing community.